
Immediate 60-Second Action Protocol:
If you have an active burst pipe discharging water inside your home right now, STOP READING AND TAKE THESE THREE ACTIONS IMMEDIATELY: (1) Run to your main water shutoff valve (located in your basement, crawlspace, or near the water meter) and turn the handle clockwise or perpendicular to the pipe to kill all pressurized water flow instantly; (2) Open the lowest cold water faucets (such as an exterior hose bib or basement wash sink) and highest hot water faucets to relieve trapped line pressure and drain residual water away from the rupture; (3) If water is near electrical outlets, appliances, or breaker panels, cut electrical power at the main circuit breaker only if you can safely reach it without stepping in standing water. Once water is stopped, call Broomfield Emergency Plumber at (303) 647-3363 for immediate 24/7 rapid emergency extraction and professional pipe repair.
1. The Catastrophic Reality of a Burst Pipe Emergency
A residential pressurized water supply pipe is a mechanical marvel that homeowners take for granted every single day. Operating silently behind finished drywall, under subflooring, and inside ceiling joists, modern plumbing delivery systems maintain continuous hydrostatic pressures ranging between 50 and 80 pounds per square inch (PSI). Under standard domestic supply flow, an unobstructed half-inch copper or PEX supply line that suffers a full-bore rupture can release between 10 and 20 gallons of water per minute into your home.
To put that volume into terrifying perspective: in just 15 minutes of an unchecked pipe burst, over 250 gallons of water will flood through your living areas—the equivalent of dumping five full bathtubs directly onto your hardwood floors, Oriental rugs, and finished drywall ceilings. In 60 minutes, more than 1,000 gallons of pressurized water will saturate structural framing, cascade down through light fixtures, soak insulation, and pool several inches deep across your basement or lower-level living space.
Along the Colorado Front Range—spanning Broomfield, Westminster, Louisville, Lafayette, Superior, and Erie—pipe bursts represent the single most common, destructive, and costly category of homeowner insurance claims. The volatile winter weather patterns characteristic of our high-altitude environment, combined with dramatic 50-degree temperature drops within 12 hours, create severe structural stresses on residential water supply piping. Knowing precisely what to do during the critical first 15 minutes following a pipe burst can mean the difference between a minor $300 spot pipe repair and a catastrophic $60,000 whole-home structural reconstruction.
2. Immediate Step-by-Step Emergency Protocol (The First 15 Minutes)
When a pipe bursts, panic is your greatest enemy. Executing a pre-planned, systematic containment sequence is vital to minimizing structural destruction, preventing electrical fire hazards, and protecting your family’s personal safety:
Step 1: Shut Off the Main Water Supply
This is the single most important action in the entire emergency sequence. Do not waste precious seconds searching for buckets, mopping floors, or trying to wrap towels around a violently spraying pipe. Every second the main water valve remains open, pressurized municipal water continues flooding into your residence. Locate the master shutoff valve and isolate the home completely. (Detailed valve location instructions are provided in Section 3 below).
Step 2: Relieve Line Pressure & Drain Remaining Water
Even after the main shutoff valve is fully closed, your home’s internal plumbing network still holds dozens of gallons of water under residual pressure. If your pipe burst occurred on an upper floor, gravity will naturally force all the water stored in upper pipe branches to drain directly out of the rupture point into your ceiling.
To redirect this water harmlessly away from your living space, immediately open the lowest faucets in your home: typically an outdoor garden hose bib (if not frozen) or a basement utility sink faucet. Simultaneously open the highest hot and cold faucets on your top floor. This breaks the internal vacuum, allowing air to enter the top of the system while gravity drains the standing water out through the lower faucet, completely arresting the spray at the rupture site.
Step 3: Evaluate Electrical & Structural Hazards
Water conducts electricity with lethal efficiency. If water from the burst pipe is spraying near electrical outlets, running down wall cavities containing wiring conduits, pooling near your basement electrical service panel, or dripping through light fixtures, do not step into standing water.
If you can safely access your main circuit breaker box without entering flooded zones, turn off the master electrical breaker immediately. If the breaker panel itself is wet, located in a flooded basement, or inaccessible without stepping in water, evacuate the premises immediately and contact your local electric utility (such as Xcel Energy) and Broomfield Emergency Plumber for hazardous site management.
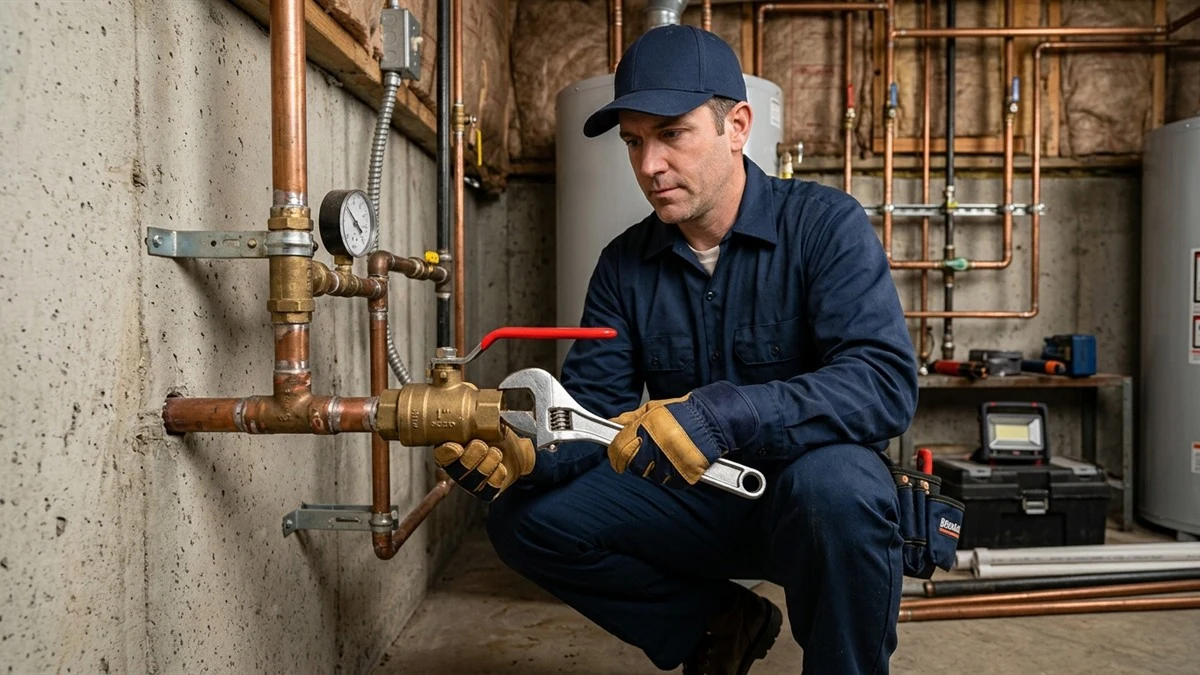
3. Where Is Your Main Water Shutoff Valve? (A Visual Locating Guide)
Every adult member of your household should know the exact physical location of your main water shutoff valve before an emergency occurs. In homes throughout Broomfield and the northern Colorado metro area, main shutoff valves are typically located in one of four primary locations based on the architectural style and construction era of the property:
Location 1: The Basement or Crawlspace Entry Point (Most Common)
In homes featuring a full basement, walkout basement, or conditioned crawlspace, the municipal water service line enters through the concrete foundation wall or floor slab on the street-facing side of the house.
Look along the perimeter foundation wall nearest to the street or front sidewalk. You will see a 3/4-inch or 1-inch copper, brass, or plastic pipe rising out of the concrete floor or entering through the concrete wall. The main shutoff valve is mounted directly on this riser pipe, usually just upstream or downstream of your internal water meter or pressure-reducing valve (PRV).
Location 2: The Utility Closet or Water Heater Room (Slab-on-Grade Homes)
In ranch-style homes, townhouses, and multi-family condominiums built on concrete slab foundations without basements, the water line typically enters near the primary mechanical equipment. Check inside your furnace room, water heater closet, or laundry utility closet. The valve is frequently located near the floor, directly behind the water heater tank or beneath a low-level access panel.
Location 3: Attached Garage Utility Enclosures
In some suburban subdivisions built during the 1980s and 1990s, the main water line enters through the concrete slab of an attached garage. To protect the valve from Colorado freezing temperatures, builders often house the shutoff valve and water meter inside a recessed wall cavity enclosed by a sheet-metal or plastic access door, often insulated with fiberglass batt insulation.
Location 4: The Exterior Street Curb Box (The Ultimate Fail-Safe)
If your internal shutoff valve is corroded, seized, broken, or completely submerged under deep floodwaters, your final option is the municipal curb stop box. This is located in your front lawn or near the street sidewalk. It consists of an iron pipe extending down to the buried city service tap, covered by a round cast-iron cap marked “WATER.”
Operating an exterior curb stop requires a specialized 5-foot steel T-handle wrench (known as a “curb key”). The key is lowered down the shaft to engage the brass valve, which is turned a quarter-turn until the key handle is perpendicular to the street line. Our emergency trucks carry heavy-duty curb keys on every call to execute street-level shutoffs in seconds when interior valves fail.
Understanding Your Valve Type: Ball Valve vs. Gate Valve
- Quarter-Turn Ball Valve (Modern): Features a straight lever handle. When the handle is parallel to the pipe run, water is ON. To shut off water, rotate the lever 90 degrees until it is perpendicular to the pipe. Ball valves are extremely reliable and rarely seize.
- Multi-Turn Gate Valve (Older Homes): Features a round or oval wheel handle resembling an outdoor garden spigot. To shut off water, turn the wheel clockwise (to the right: “righty-tighty”) through multiple complete rotations until the interior brass gate seats firmly. Caution: On older gate valves, the internal brass stem can corrode and snap. Never use excessive force or pipe wrenches on a fragile gate valve.

4. The Hidden Physics: Why Do Pipes Actually Burst?
Most homeowners assume that when a pipe freezes, the expanding ice plug simply pushes outward against the pipe walls until the metal or plastic splits open at the exact point of the freeze. While this seems intuitive, hydraulic engineering reveals a far more fascinating—and destructive—mechanical phenomenon:
The Hydraulic Pressure Spike Phenomenon
Water is one of the extraordinarily rare substances on Earth that expands as it transitions from liquid to solid. At 32°F (0°C), water increases in volume by approximately 9%. When a section of water pipe exposed to sub-freezing drafts (such as in an exterior wall cavity or unheated crawlspace) freezes, an ice blockage forms, adhering tightly to the inner pipe wall.
As the freezing process continues along the length of the pipe, the ice expands. However, the ice does not burst the pipe at the freeze point immediately. Instead, the expanding ice acts as a hydraulic piston, compressing the liquid water trapped between the ice plug and the closed downstream fixture (faucet, toilet valve, or shower cartridge).
Because liquid water is practically incompressible, the hydrostatic pressure inside that trapped segment skyrockets from a safe 60 PSI to an astounding 25,000 to 30,000+ PSI. Eventually, this monumental pressure exceeds the hoop tensile strength of the copper wall, PEX fitting, or PVC solvent weld. The pipe ruptures violently—often several feet away from the actual ice plug in an entirely warm, heated section of the house!
Other Leading Causes of Residential Pipe Ruptures
- Excessive Municipal Water Pressure: In many hillside and high-elevation zones around Broomfield and Boulder County, municipal water main pressures can exceed 100 to 140 PSI to reach elevated neighborhoods. If your home’s Pressure-Reducing Valve (PRV) fails, this extreme pressure puts continuous fatigue stress on pipe joints, water heater tanks, and appliance hoses, eventually triggering a rupture.
- Water Hammer Shockwaves: When high-velocity solenoid valves (found in modern washing machines and dishwashers) snap shut in milliseconds, the momentum of the moving water column slams against the closed valve, creating shockwaves up to 400 PSI that vibrate through the framing, fatiguing soldered copper fittings until they snap.
- Pinhole Corrosion & Galvanic Decay: Chemical oxidation and microbial-induced corrosion can eat microscopic pinholes through copper piping over 20 to 30 years. Similarly, when copper is directly joined to galvanized steel without a dielectric union, galvanic electrolysis rapidly erodes the pipe threads, leading to sudden mechanical separation.
5. Documenting the Disaster: The Insurance Protocol
How you document the aftermath of a burst pipe in the first 24 hours directly determines whether your insurance company pays your claim in full or attempts to deny coverage under “gradual water damage” or “negligence” clauses:
1. Take Extensive Video and High-Resolution Photography Immediately
Before moving items, cutting drywall, or discarding damaged carpets, take comprehensive, slow-panning video footage of every affected room. Capture waterlines on baseboards, warped hardwood planks, sagging ceiling drywall, wet electronics, and water pooled on floors. Take close-up photographs of the ruptured pipe segment itself before it is repaired.
2. Preserve the Failed Pipe Segment
When our master plumbers execute the mechanical repair, we always carefully cut out the ruptured pipe section and hand it directly to the homeowner inside a sealed container. Insurance adjusters frequently require physical custody of the burst fitting to verify that the failure was sudden and accidental (such as freeze expansion or material rupture) rather than long-term chronic weeping that should have been caught by routine maintenance.
3. Create an Itemized Contents Inventory
List every piece of damaged personal property: furniture, mattresses, clothing, electronics, books, and artwork. Record the brand, model number, approximate purchase date, and estimated replacement cost. Do not throw damaged items into the trash until the insurance adjuster has completed their on-site physical inspection.
4. File the Claim Under “Sudden and Accidental Discharge”
When calling your insurance company’s claims hotline, use precise insurance terminology. Standard homeowners policies cover water damage that is “sudden, accidental, and direct.” Avoid ambiguous phrasing like “the pipe has been leaking for a while” or “we noticed dampness last month,” as claims adjusters are trained to flag such statements to classify the event as excluded gradual wear-and-tear.
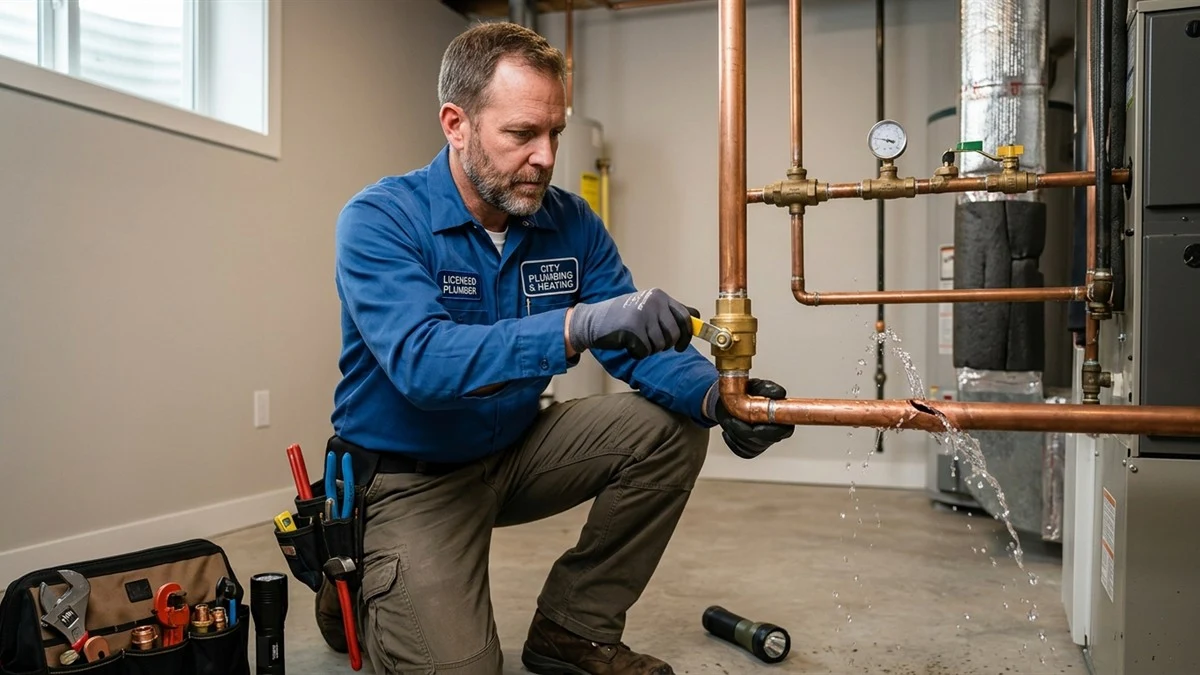
6. Professional Pipe Repair Technologies: Copper, PEX & ProPress
Once the flood is contained, restoring your domestic water supply requires professional mechanical repairs executed to current International Plumbing Code (IPC) and local Broomfield building amendments. Depending on the pipe material and location, our licensed technicians deploy three proven repair methodologies:
1. Modern Cross-Linked Polyethylene (PEX-A) Retrofitting
For homes suffering from freeze-burst pipes in exterior walls or unconditioned crawlspaces, replacing rigid copper with high-density PEX-A (such as Uponor ProPEX) is the gold standard of modern plumbing. PEX-A is extraordinarily flexible and possesses thermal shape-memory: when water freezes inside a PEX-A line, the pipe expands up to 300% of its normal diameter without splitting, then returns to its original dimension once thawed. It eliminates soldered joints inside wall cavities, dramatically reducing future freeze vulnerability.
2. Viega ProPress Flame-Free Cold Press Connections
In high-risk environments where water is still dripping from insulation or where pipes run near flammable wood framing, traditional torch soldering poses severe structural fire hazards. Our service fleet is equipped with hydraulic Viega ProPress tooling. ProPress utilizes engineered copper fittings with internal EPDM sealing rings, cold-pressing the fitting onto the copper pipe with over 7,000 pounds of mechanical force in under 4 seconds. It creates a permanent, flame-free, code-certified joint capable of withstanding 200+ PSI immediately.
3. Traditional Solder & Brazing Restoration
In dry, exposed mechanical rooms or where strict commercial plumbing specifications demand all-copper infrastructure, our master plumbers perform traditional lead-free sweat soldering using high-tensile silver-bearing alloy wire and lead-free flux, thoroughly wire-brushing, deburring, and pressure-testing every replaced fitting to 100 PSI hydrostatic test pressure before re-commissioning.

7. Structural Drying & Mold Prevention: The 48-Hour Biological Window
Fixing the broken pipe is only the first phase of the restoration process. The secondary hazard—structural mold colonization—begins the microsecond water contacts building materials.
Under the Environmental Protection Agency (EPA) and IICRC guidelines, toxic mold spores (including Aspergillus, Penicillium, and Stachybotrys) require only moisture, an organic cellulose food source (such as drywall paper backing, lumber joists, or carpet subfloor), and a temperature above 65°F to germinate. Germination occurs within 24 to 48 hours of initial water exposure.
The Critical Drying Phases
- Mechanical Water Extraction: Truck-mounted vacuum units extract bulk liquid water from carpets, hardwood, and concrete subfloors at a rate 1,200 times faster than evaporation.
- Controlled Demolition of Trapped Moisture: Wet fiberglass batt insulation loses 100% of its thermal resistance (R-value) and becomes an impenetrable mold sponge. Wet drywall must be cut away 12 to 24 inches above the visible waterline (known as a “flood cut”) to allow wall cavities to breathe.
- Industrial Air Flow & Dehumidification: Commercial centrifugal air movers deliver high-velocity laminar airflow across surfaces, drawing trapped moisture out into the air, where Low-Grain Refrigerant (LGR) or desiccant dehumidifiers condense and pump the water out of the building.
- Antimicrobial Sanitization: EPA-registered botanical or quaternary antimicrobial agents are fogged throughout the drying zone to eradicate bacterial colonies and inhibit fungal spore germination.
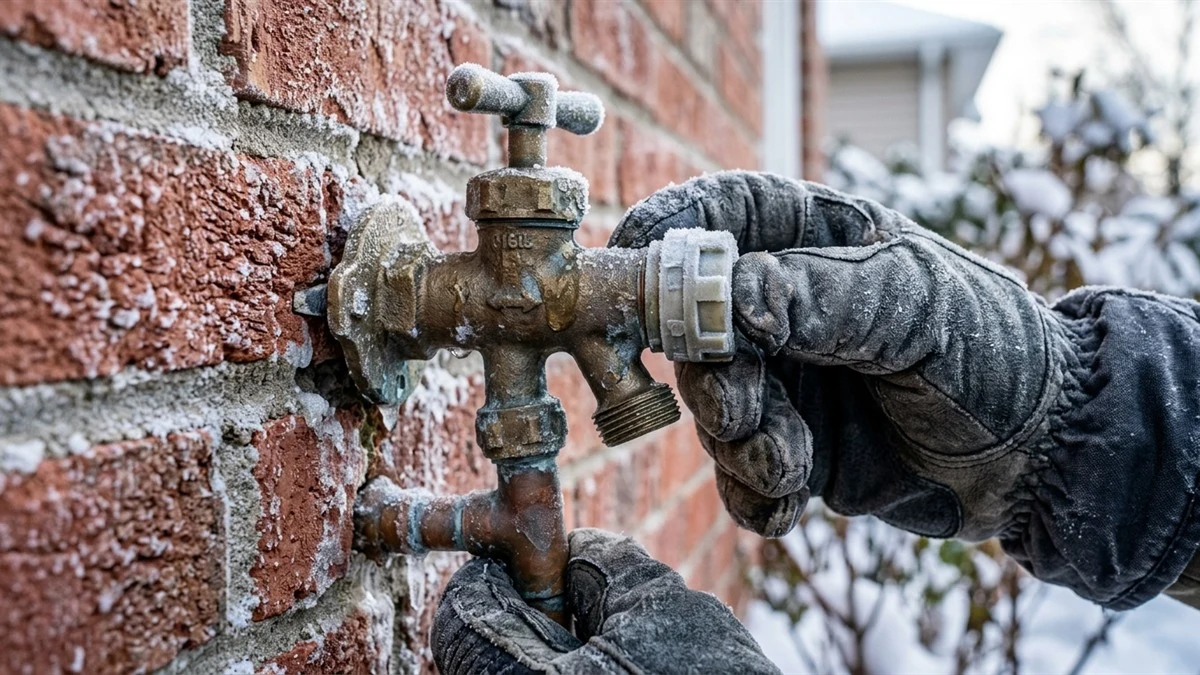
8. Colorado Winter Defense: How to Bulletproof Your Home Against Freezing
Winter along the Colorado Front Range is unforgiving. Arctic cold fronts sweeping down from Canada across the plains can plunge temperatures from 60°F to -15°F in less than 24 hours, accompanied by 40 MPH desiccating winds. Follow these professional winterization protocols to safeguard your plumbing:
| Vulnerable Zone | Failure Mechanism | Mandatory Homeowner Preventive Action |
|---|---|---|
| Outdoor Hose Bibs & Spigots | Connected garden hoses trap water inside the sillcock valve stem, freezing and rupturing the interior pipe inside the wall. | Disconnect all hoses before October 15th. Turn off the interior isolation shutoff valve, drain the bleeder cap, and install insulated hard-shell foam covers. |
| Kitchen & Bath Vanities on Exterior Walls | Closed cabinet doors trap cold air from exterior wall cavities, preventing heated room air from warming pipes. | Open vanity and under-sink cabinet doors during sub-zero cold snaps to allow warm household air to circulate directly around pipes. |
| Unheated Crawlspaces & Attics | Sub-zero drafts blow through foundation vents or soffits directly across uninsulated water supply lines. | Close foundation crawlspace vents in late autumn. Wrap all exposed pipes in minimum 5/8-inch wall closed-cell polyethylene foam insulation or self-regulating thermostatically controlled heat cables. |
| Vacation Vacancies & Low Thermostats | Furnace cycling off or thermostats set below 55°F allows wall cavity temperatures to drop below 32°F during blizzards. | Never set thermostats lower than 58°F–60°F when traveling in winter. If leaving for more than 48 hours, shut off the main water valve and drain the plumbing system. |
The “Trickling Faucet” Technique: How and When to Use It
During severe Arctic blasts where outdoor ambient temperatures plunge below 0°F, letting a faucet drip is a proven mechanical defense. However, many homeowners execute this incorrectly:
Do not let it drip one tiny drop every five seconds. Instead, turn on the cold faucet on a fixture served by an exterior wall line so that a continuous, pencil-lead-thin stream of water runs into the drain. This steady stream accomplishes two critical goals: (1) It draws fresh water constantly from the warm municipal main buried deep underground below the frost line (which sits at roughly 48°F–52°F), preventing stagnant water inside the pipe from cooling down to freezing; and (2) Even if an ice collar begins forming on the inner pipe wall, the open faucet provides an immediate hydraulic pressure relief pathway, preventing the catastrophic 30,000 PSI pressure spike that causes the pipe to burst!
9. “What We Check on a Burst Pipe Emergency Dispatch”
When you call Broomfield Emergency Plumber for a burst pipe emergency, our certified technicians execute an exhaustive emergency dispatch protocol:
- Immediate Hydrostatic Line Isolation: We confirm total master shutoff, utilizing our heavy curb keys on street meters if interior valves are compromised.
- Rupture Point Isolation: We cut open minimum drywall access to pinpoint the exact failure location without unnecessary structural destruction.
- Thermal Camera Whole-House Scan: We deploy infrared thermal cameras throughout the property to identify all hidden water migration pathways behind walls, ceilings, and under floorboards.
- Secondary Freeze Defect Check: We inspect neighboring pipe runs. When one pipe freezes and bursts, adjacent hot and cold lines frequently suffered ice stress and are on the verge of secondary failure.
- Permanent Mechanical Repair: We install commercial-grade copper or Uponor PEX-A piping utilizing ProPress or expansion fittings, backed by our lifetime workmanship warranty.
- Pressure-Reducing Valve (PRV) Audit: We test your home’s incoming water pressure with a calibrated test gauge to verify your home is not being subjected to dangerous municipal over-pressurization above 80 PSI.
- Insurance Restoration Documentation: We provide high-resolution photos, detailed diagnostic write-ups, and itemized billing statements formatted specifically for insurance claims adjusters.
10. Frequently Asked Questions (FAQ)
Q1: How can I thaw a frozen pipe before it bursts?
Answer: If you turn on a faucet and only a trickle emerges during freezing weather, your pipe is frozen but may not have burst yet. First, open the faucet fully so water has an exit path as it melts. Next, trace the pipe into unheated areas. Apply gentle, gradual heat using a handheld hair dryer, an electric heating pad wrapped around the pipe, or a portable space heater directed at the wall cavity. NEVER use open flames, propane blowtorches, kerosene heaters, or charcoal lighters—open torches ignite wood framing inside wall cavities and cause rapid steam expansion that instantly explodes the pipe. Keep the main water shutoff valve immediately accessible in case the pipe reveals a split as the ice plug dissolves.
Q2: Can I leave a burst pipe until morning if I shut off the main water valve?
Answer: While shutting off the main valve stops new water from spraying, leaving the standing floodwater unattended until morning is a dangerous mistake. Water trapped in drywall, subflooring, and carpet will continue migrating horizontally and vertically for hours, doubling the affected square footage. Furthermore, water saturation begins destroying hardwood flooring within 3 hours, and toxic mold colonization commences within 24 hours. Emergency extraction and immediate repair should be initiated without delay.
Q3: How much does it typically cost to repair a burst pipe?
Answer: Direct plumbing repair of an accessible burst pipe segment typically ranges between $350 and $850, depending on accessibility, pipe material, and after-hours emergency timing. However, the associated water damage extraction, structural drying, and drywall restoration can range from $2,500 for a minor localized leak to over $35,000 for a multi-room, two-story flood. This is why rapid shutoff within the first 5 minutes is the single most valuable action you can take.
Q4: Will homeowners insurance pay for the plumber’s repair bill?
Answer: In standard homeowners insurance policies (HO-3), there is an important distinction: insurance typically pays for the consequential water damage (tear-out of drywall, floor drying, mold remediation, and rebuilding), but often excludes the specific $300 to $600 plumbing bill for the replacement copper or PEX fitting itself, viewing pipe maintenance as an owner responsibility. However, if the plumber must tear through a finished tile floor or ceiling joist to access the burst pipe, the cost to access and restore the access hole is usually fully covered.
Q5: What happens if a pipe bursts while I am away on vacation?
Answer: An unchecked pipe burst running for several days while a family is away will release tens of thousands of gallons of water, frequently causing structural collapse of ceilings, foundation flooding, total hardwood warping, and catastrophic toxic black mold infestations. Insurance adjusters will scrutinize whether the homeowner maintained heat in the home (usually minimum 55°F). Installing a smart whole-house automatic water shutoff valve (such as Flo by Moen or Phyn) detects abnormal continuous flow and automatically shuts off your main water within minutes, sending an alert directly to your smartphone anywhere in the world.
Q6: Why did my pipe burst after the weather warmed up rather than during the freeze?
Answer: This is a very common misconception. The pipe actually ruptured during the sub-zero freeze due to ice expansion and trapped hydraulic pressure. However, because the ice plug was frozen solid inside the pipe, it acted as a cork, sealing the fissure. Once the weather warms up or the indoor furnace runs, the ice plug melts, releasing full municipal water pressure through the split and causing an immediate indoor deluge that homeowners mistakenly believe just occurred.
Q7: Is PEX really 100% immune to bursting from freezing?
Answer: While high-density cross-linked polyethylene (specifically PEX-A) is far superior to rigid copper and PVC due to its elasticity and ability to expand without splitting, it is not completely indestructible. If PEX freezes repeatedly over multiple seasons or if the freeze occurs directly at a rigid brass or plastic fitting or crimp collar, the fitting itself can crack or separate. Proper pipe insulation and draft elimination remain essential even with modern PEX plumbing.
11. Related Services & Emergency Plumbing Hubs
To protect your property from ongoing water damage and explore our specialized mechanical repair solutions, explore our core service departments:
- Immediate Emergency Assistance: Read about our 30-to-60 minute rapid response protocols at 24/7 Emergency Plumbing in Broomfield, CO.
- Electronic Leak Detection: If you suspect a hidden water pipe leak inside walls or under foundation slabs, visit our Non-Invasive Leak Detection Services.
- Water Heater Emergency Leaks: If your burst pipe originated from an overheated or ruptured water heater tank, access our Water Heater Repair & Replacement Hub.
- Fixture & Valve Replacement: Upgrade seized gate valves to modern quarter-turn ball valves with our Faucet & Fixture Repair Team.
Burst Pipe Emergency Right Now? Call Our 24/7 Rapid Response Team!
Water damage spreads exponentially every single minute a burst pipe is left unaddressed. Our licensed, bonded, and insured Colorado emergency master plumbers are on call right now with fully stocked trucks, ProPress repair equipment, and moisture diagnostic systems. Average arrival time is 30 to 60 minutes across Broomfield and surrounding communities.