
1. Executive Summary & The Biomechanics of a Toilet Seal
The modern gravity-flush water closet is one of the most heavily used mechanical appliances in any residential home, enduring hundreds of pounds of cyclical dynamic loading every single day. Yet, the entire mechanical boundary between the porcelain bowl and the home’s vertical soil pipe depends upon a surprisingly vulnerable assembly: a mechanical closet flange secured to the subfloor, two brass closet bolts, and a malleable wax sealing ring compressed between the porcelain horn and the flange throat.
Unlike pressurized water supply lines or rigid glued drainage fittings, the connection between a toilet bowl and the drainage stack is a mechanical compression joint. When a 70-to-100-pound vitreous china toilet is set onto the closet flange, the weight of the toilet compresses the wax ring, molding the soft beeswax and petroleum jelly matrix into every microscopic imperfection of the porcelain and plastic surfaces to create an airtight and watertight seal.
Under the International Plumbing Code (IPC Section 405.4), the joint between a water closet and the drainage pipe must be gas-tight and water-tight under all operating conditions. If the toilet rocks even 1/16 of an inch due to an unlevel floor or loose closet bolts, that mechanical movement breaks the wax seal. Because traditional wax has zero elastic memory—it deforms under pressure but cannot spring back—a broken wax seal will never reseal itself. Every subsequent flush forces pressurized wastewater, urine, and sewer gases outward across the bathroom subfloor.
2. Closet Flange Engineering: Elevation Standards & Alignment Codes
The single most common root cause of premature wax ring failure across Front Range Colorado homes is incorrect closet flange elevation relative to the finished floor.
During new construction or bathroom remodeling, contractors frequently install the closet flange directly on top of the rough OSB or plywood subfloor. Later, tile setters lay down 1/4-inch cement backer board, mortar, and 3/8-inch porcelain tile. This raises the finished floor surface by 1/2 to 3/4 inch, leaving the closet flange recessed deep below the finished floor level.
The IPC 405.4.1 Elevation Mandate
Plumbing codes are uncompromising on this geometric requirement:
- Correct Flange Elevation: The bottom lip of the closet flange must sit flush upon the finished floor surface, which means the top rim of the flange must protrude 1/4 inch to 5/16 inch above the finished floor.
- The Danger of Recessed Flanges: When a closet flange is flush with or sunken below the finished tile floor, standard wax rings cannot achieve sufficient volumetric compression. Installers often attempt to compensate by stacking two wax rings on top of each other. Stacking wax rings creates a tall, unstable pillar of wax without structural lateral support; within months, hydraulic pressure from toilet flushes blows the center out of the stacked wax, allowing wastewater to seep between the subfloor and the tile.
| Flange Elevation Profile | Relationship to Finished Floor | Wax Compression Dynamics | Required Corrective Action |
|---|---|---|---|
| Code Compliant (Ideal) | Flange rests on top of tile (+1/4″ above floor) | Optimal 40%–50% compression of standard wax ring | Install standard wax ring; torque bolts to 30 in-lbs |
| Flush with Tile (Borderline) | Flange rim is exactly level with finished tile (0″ offset) | Marginal compression (less than 20% squeeze) | Install extra-thick jumbo wax ring with poly horn |
| Recessed (-1/4″ to -1/2″ Low) | Flange sits on rough subfloor beneath new tile | Zero wax contact; toilet horn floats above flange | Install rigid PVC flange extension ring with silicone seal |
| Too High (> +1/2″ Above Floor) | Flange elevated excessively above finished floor | Toilet base rocks on flange; porcelain cannot touch floor | Cut and lower waste pipe or install custom floor shims |
3. The Mechanics of Wax Ring Blowout: Why Toilets Fail
A standard toilet wax ring is compounded from a blend of unrefined petroleum wax, beeswax, and microcrystalline plasticizers. While wax has been used successfully for over a century due to its malleability, chemical inertness to urine salts, and low cost, it possesses distinct physical failure modes:
1. Dynamic Toilet Rocking & Lateral Shear
When someone sits down on a toilet, body weight exerts significant vertical and lateral force. If the bathroom floor has high spots or the closet bolts are slightly loose, the toilet bowl rocks microscopically from side to side. Because wax cannot spring back, every rocking movement crushes the wax further away from the porcelain horn. Within a few weeks of rocking, a permanent 1/8-inch air gap forms between the wax and the toilet horn, destroying the seal.
2. Aggressive Plunger Blowouts
When a toilet clog occurs, homeowners often grab a standard rubber plunger and pump violently. Pumping a plunger generates intense alternating hydraulic pressure waves (+10 to -8 PSI) inside the trapway. If the drain blockage is located downstream in the soil stack, that immense hydraulic pressure has nowhere to go except sideways against the soft wax ring. The pressure wave easily blows the wax outward off the closet flange, creating an immediate, permanent leak channel.
3. Radiant Floor Heat Melting
In modern Colorado bathrooms equipped with in-floor hydronic or electric radiant heating, running radiant heating loops too close to the toilet flange can cause catastrophic failure. Standard petroleum wax has a melting point of approximately 130°F and begins to soften significantly at 105°F. If radiant floor loops sit within 6 inches of the closet collar, the sustained warmth softens the wax into a semi-liquid paste, allowing it to slump into the drain pipe and destroy the seal. When installing radiant heating, a minimum 8-inch clearance radius around the toilet flange must be kept completely unheated.
4. Wax Ring vs. Modern Foam/Rubber Gaskets: The Professional Verdict
In recent years, plumbing manufacturers have developed wax-free toilet seals constructed from closed-cell EPDM foam, silicone rubber, and polyurethane elastomers (such as the Fernco Wax-Free Seal, Danco Perfect Seal, or Fluidmaster Better Than Wax).
Comparing traditional wax to modern wax-free technology reveals distinct trade-offs:
- Traditional Reinforced Wax Rings with Poly Horn: Time-tested, highly effective on perfectly rigid, level floors with properly elevated flanges. The molded polyethylene funnel (horn) extends downward into the flange throat, providing directional guidance for waste and shielding the wax from direct hydraulic impingement. However, wax is single-use only; if the toilet is lifted for any reason, the wax must be scraped off and replaced.
- Elastomeric Rubber/Foam Gaskets: Feature 100% elastic memory. If the toilet flexes or rocks slightly, the rubber springs back to maintain contact with the porcelain bowl. Furthermore, rubber seals are clean to install, will not melt from radiant floor heating, and allow the toilet to be repositioned or removed multiple times during tile work without replacing the seal.
5. Diagnosing Concealed Subfloor Rot: The Forensic Inspection
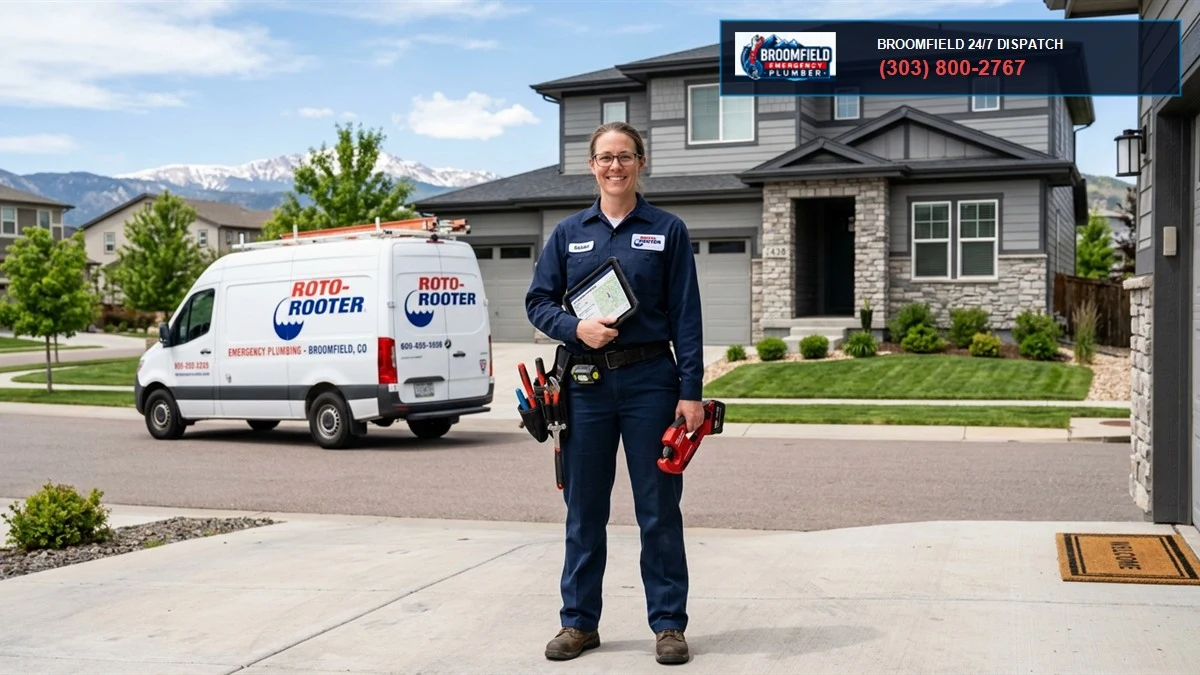
Because most modern bathrooms feature sheet vinyl, porcelain tile, or waterproof luxury vinyl plank (LVP) flooring, wastewater leaking from a blown wax ring cannot penetrate upward through the waterproof flooring surface. Instead, gravity forces the contaminated blackwater outward along the subfloor plane, soaking deep into the wood fibers of the plywood, OSB, and structural floor joists beneath.
Forensic Warning Signs of Hidden Subfloor Decay:
- Soft or Spongy Flooring Around the Bowl: Standing next to the toilet and shifting your weight causes the floor to flex, deflect, or feel soft beneath your feet.
- Persistent Musty Sewer Odor: A chronic sour, musty, or fecal odor in the bathroom that persists despite aggressive bleaching and surface scrubbing. This is caused by bacteria metabolizing inside the soaked wood subfloor.
- Discolored Ceiling Drywall Below: In two-story homes, inspect the ceiling of the room or basement directly beneath the bathroom. Brown water stains, bubbling paint, or sagging drywall indicate long-term water migration through the subfloor.
- Loose, Rusted Closet Bolts: If the decorative plastic caps pop off the closet bolts and you discover rusted, corroded steel bolts or the bolt spins freely without tightening, the subfloor anchors or the flange bolt slots have completely rotted away.
6. Closet Flange Repair Techniques: From Cracked Slots to Broken PVC
When removing a leaking toilet, plumbers frequently discover that the closet flange itself is physically broken. Closet flanges are manufactured from cast iron, PVC, or ABS plastic, often with a stamped metal or plastic collar ring.
Common flange failure profiles and their engineered repair solutions include:
1. Broken Bolt Channel Slots (Plastic Flanges)
Over-tightening closet bolts during installation frequently cracks the thin plastic track of an all-plastic PVC or ABS flange. Once the track is cracked, the closet bolt pulls straight out of the slot, allowing the toilet to rock freely.
Engineered Repair: Instead of jackhammering the concrete slab or cutting out the entire drain stack from the floor below, technicians install a two-piece stainless steel split repair ring (such as the Oatey Quick-Fix or Sioux Chief 886 series). The split ring slides underneath the cracked plastic rim, interlocking into a rigid, unbreakable 360-degree steel collar that accommodates new brass closet bolts.
2. Rotted Metal Collar Rings (Cast Iron or PVC with Carbon Steel)
Legacy PVC flanges were manufactured with stamped carbon steel outer rings. Decades of urine exposure and moisture condense on the cold metal, causing the steel ring to rust completely into flaky iron oxide flakes.
Engineered Repair: The technician removes all rusted metal fragments with reciprocating cutting shears and installs a heavy-duty cast brass or 304 stainless-steel replacement flange collar anchored securely through the subfloor using 2-1/2 inch ceramic-coated structural Torx screws.
3. Internal Twist-Lock Mechanical Flange Replacement
If the entire plastic or cast-iron flange is shattered beyond repair, a professional technician can cut the broken flange flush with the pipe and install a mechanical compression replacement flange (such as the Oatey Twist-N-Set). The replacement flange slides down inside the 3-inch or 4-inch drain pipe; turning the top bolts expands a heavy ribbed neoprene rubber compression gasket outward against the internal pipe wall, creating a certified airtight and watertight seal meeting ASTM C443 standards without solvent welding.
7. Structural Subfloor Reconstruction & Sistering Joists
When a leaking toilet has saturated the wooden subfloor for months or years, the structural integrity of the floor deck is compromised. Standard 3/4-inch plywood or OSB subflooring undergoes fungal dry rot (wood-decay fungus) when moisture content exceeds 20% for sustained periods. The cellulose and lignin break down, transforming structural wood into crumbly, punky sponge with zero load-bearing strength.
Engineering Deflection Limits & Joist Span Ratings (L/360 vs L/720)
When repairing or replacing bathroom subflooring beneath water closets, understanding structural deflection criteria is critical for preventing recurrent wax seal blowouts. Under the International Residential Code (IRC Table R301.7), living area floors are engineered to a minimum deflection limit of L/360 (the span of the floor joist divided by 360 under combined 40 PSF live load and 10 PSF dead load).
However, when stone or ceramic tile is installed over the subfloor, the Ceramic Tile Institute of America and the Tile Council of North America (TCNA) mandate an increased stiffness rating of L/720 for natural stone (such as marble, slate, or travertine). If floor joists span 14 feet and deflect more than 0.23 inches under the concentrated dynamic weight of an individual seated on a 100-pound toilet, the structural deflection will crack the rigid mortar bed, break tile grout lines, and shear the wax ring. Whenever floor joists exhibit bounce or deflection during a subfloor repair, technicians must install solid 2×10 wood bridging, mid-span blocking, or under-floor steel jack posts to achieve absolute structural rigidity.
Step-by-Step Subfloor Reconstruction Protocol:
- Demolition & Perimeter Marking: Remove the toilet, baseboards, and surrounding tile or vinyl. Using an oscillating multi-tool, plunge-cut through the rotted subfloor, cutting back to the centerlines of the nearest sound, undamaged floor joists (typically a 3′ × 3′ or 4′ × 4′ square opening).
- Structural Joist Inspection & Sistering: Inspect the 2×10 or 2×12 dimensional lumber floor joists. If the top edge of a joist has surface rot deeper than 1/4 inch, scrape away rotted fibers. “Sister” a new matching dimensional lumber joist alongside the damaged joist, securing it with structural adhesive and staggered pairs of 3-inch structural timber screws every 12 inches on-center. Add 2×4 blocking along all unsupported edges.
- Antimicrobial Fogging: Treat all exposed framing and soil pipe penetrations with an EPA-registered broad-spectrum botanical disinfectant (such as Benefect Decon 30) to eradicate fungal spores and coliform bacteria.
- New Subfloor Installation: Install a replacement patch of 3/4-inch Tongue-and-Groove Exterior-Grade CDX Plywood (avoid OSB in wet areas). Secure the patch using construction polyurethane subfloor adhesive and 2-inch ring-shank flooring screws spaced 6 inches along joist edges.
- Flange Remounting: Re-cut the 4-inch hole for the closet pipe using a hole saw. Anchor the new closet flange firmly to the structural plywood using non-corrosive stainless-steel screws.
8. Step-by-Step Professional Toilet Resetting: The Leak-Proof Method
Resetting a toilet to guarantee decades of leak-free service requires strict adherence to professional trade craftsmanship:
Master Plumber Installation Sequence:
- Install Solid Brass Closet Bolts: Discard cheap zinc-plated steel bolts included in retail boxes (they rust in 2 years). Install 5/16-inch solid brass closet bolts into the flange slots. Thread a brass nut and stainless-steel washer down onto each bolt directly against the flange rim; this locks the bolts rigidly upright at a perfect 90-degree vertical angle, preventing them from sliding or tipping over when lowering the heavy toilet.
- Mount the Gasket: Place a premium reinforced wax ring with poly horn (or certified elastomeric rubber seal) directly onto the closet flange throat, ensuring the horn points straight down into the pipe.
- Set the Toilet Square: Carefully straddle the toilet bowl, align the base holes with the protruding brass bolts, and lower the bowl straight down in a single smooth motion. Do not twist or rock the bowl once contact with the wax is made.
- Uniform Body Weight Compression: Press downward firmly with your body weight centered over the middle of the bowl until the porcelain contacts the finished tile floor.
- Precision Torquing: Slide the plastic cap washer, brass washer, and brass nut onto the bolts. Tighten each side alternately using a hand wrench, applying gentle, uniform torque (approximately 30 to 40 inch-pounds). WARNING: Never use power drivers or excessive force; over-torquing will instantly snap the vitreous china porcelain base!
- Floor Leveling Shims: Check the bowl with a torpedo level. If the floor is uneven, insert hard composite plastic leveling shims beneath the porcelain base until all rocking is 100% eliminated. Cut shims flush with a utility knife.
- The Code-Compliant Perimeter Seal (IPC 405.4): Apply a neat bead of 100% waterproof silicone or mold-resistant acrylic latex caulk around the front and sides of the toilet base where it meets the tile. Leave a 1-inch open weep gap at the very back of the base. This weep gap ensures that if the wax ring ever fails in the future, leaking water will emerge onto the tile floor to alert the homeowner immediately, rather than remaining trapped inside the bowl skirt and silently rotting the subfloor for years!
9. Cast Iron Closet Flanges: Lead-and-Oakum Joint Restoration
In historic mid-century homes across Broomfield, Boulder, and Arvada, plumbers routinely encounter heavy cast iron soil stacks and cast iron closet flanges installed between 1940 and 1975. Unlike modern plastic pipe solvent-welded together with PVC cement, vintage cast-iron flanges were connected using molten lead and tarred oakum fiber.
The lead-and-oakum joint was created by tightly packing oiled hemp fibers (oakum) into the annular hub between the soil pipe and the cast iron flange using packing irons. Molten lead heated to over 700°F was then poured into the vertical hub in a single continuous pour. Once cooled, the lead was struck with caulking irons to drive the soft metal tightly against the iron walls, creating a watertight mechanical friction seal.
Modern Restoration Techniques for Cast Iron Flanges
Over 50 to 70 years of service, the oakum fibers dry out, or building settlement cracks the brittle cast-iron bolt ears. Replacing a lead-joint flange historically required melting the lead out using an open acetylene torch—an extreme fire hazard inside finished residential bathrooms.
Today, modern plumbing specialists deploy two non-thermal restoration methods:
- Internal Expansion Mechanical Cast-Iron Flanges: The broken cast-iron collar is cut out using a high-speed internal pipe cutter. A heavy-duty cast-iron replacement flange equipped with a multi-ribbed EPDM compression gasket (such as the Tyler Pipe or Charlotte Pipe mechanical flange) is inserted into the pipe. Tightening three Allen-head hex bolts draws a lower wedge upward, squeezing the rubber outward against the rough interior wall of the cast iron with over 250 PSI of radial compression.
- Inside-Fit PVC Transition Bushings: Where cast iron transitions to PVC, an engineered mechanical rubber donut gasket is pressed into the hub, followed by a Schedule 40 PVC closet flange solvent-welded in place, eliminating metal corrosion permanently.
10. Wall-Hung Commercial Water Closets & In-Wall Carrier Engineering
Modern high-end luxury residential construction in Colorado increasingly incorporates minimalist wall-hung toilets with concealed in-wall tanks (such as Geberit, Toto Neorest, or Kohler Veil systems). While wall-hung toilets elevate bathroom aesthetics and simplify floor mopping, their mounting physics are fundamentally different from floor-mounted gravity toilets.
A wall-hung water closet does not rest on the bathroom subfloor; instead, it is cantilevered off a heavy-gauge structural steel in-wall carrier frame (such as a Zurn or JR Smith commercial carrier) anchored directly to the concrete slab or structural wood studs inside a 2×6 wall cavity.
Cantilevered Torque & Gasket Physics
- Moment Arm Torque Loading: When a 250-pound individual sits on a wall-hung toilet, the 24-inch cantilevered bowl acts as a lever arm, exerting over 500 foot-pounds of rotational torque on the upper mounting studs. The steel carrier frame must be rated for a minimum 500-to-800-pound dynamic load without deflecting more than 1/16 inch under ASME A112.19.12 standards.
- Neoprene Felt-Faced Compression Gaskets: Wall-hung toilets never use standard wax rings. The lateral shear forces of a cantilevered bowl would quickly squeeze wax out of the joint. Instead, wall-hung toilets utilize a dense, pre-formed neoprene closed-cell synthetic rubber gasket with a reinforced felt backing or a multi-lip EPDM O-ring sleeve lubricated with pure silicone grease.
11. Toilet Rough-In Dimensions: 10-Inch vs. 12-Inch vs. 14-Inch Centers
Before purchasing a replacement toilet or roughing in a new closet collar, measuring the exact rough-in dimension is mandatory. The rough-in dimension is defined as the distance from the finished drywall surface behind the toilet to the exact centerline of the closet bolts / drain pipe (excluding the thickness of baseboard molding).
| Rough-In Dimension | Prevalence in Colorado Homes | Architectural Context | Replacement Toilet Selection |
|---|---|---|---|
| 12-Inch (Standard) | 90% of all residential installations | Standard modern residential construction standard | Accommodates virtually all standard toilet models |
| 10-Inch (Tight Rough-In) | 7%–8% (Basements & small powder rooms) | Common where basement floor joists or ductwork obstructed layout | Requires dedicated 10″ rough-in bowl or modular adapter trapway |
| 14-Inch (Deep Rough-In) | 2%–3% (Vintage 1950s ranch homes) | Accommodated thick vintage plaster walls and high-tank toilets | Requires 14″ rough toilet to avoid a massive 2-3″ gap behind tank |
The Hazards of Offset Closet Flanges
When a rough-in dimension is slightly off, amateur installers often attempt to install an offset closet flange (a specialized fitting that shifts the bolt slots 1-1/2 to 2 inches in one direction via an angled interior chute).
Plumbing engineers strongly caution against offset flanges:
- Choke Point for Solid Waste: The diagonal offset creates an internal 45-degree shelf that disrupts the laminar gravity drop. Toilet paper and solid waste strike this shelf, creating recurring, chronic clogs.
- Snake Obstruction: An offset flange prevents standard 5/8-inch or 3/4-inch mechanical drain auger cables from entering the soil pipe smoothly, often causing the cutter head to jam or punch through the PVC fitting wall.
12. Frequently Asked Questions (FAQ)
Why does my toilet rock back and forth when I sit down?
A rocking toilet occurs when either (1) the finished tile floor is slightly uneven and the installer failed to install hard composite shims, (2) the closet flange sits too high above the finished floor, preventing the porcelain bowl from resting flat on the floor, or (3) the wooden subfloor around the flange has rotted and softened, allowing the flange and mounting screws to pull upward. A rocking toilet must be addressed immediately; every rocking cycle accelerates wax seal blowout and subfloor water saturation.
Can I reuse my existing wax ring if I remove the toilet to paint or tile?
No, never. Traditional wax rings are strictly single-use mechanical compression seals. Once a wax ring has been compressed by the weight of a toilet, it deforms permanently and loses all elasticity. If the toilet is lifted even a fraction of an inch, the bond between the wax and porcelain is broken. Reinstalling a toilet onto a used wax ring guarantees an immediate sewage leak. Always scrape the old wax off completely and install a brand-new wax ring or rubber gasket.
Is it required by plumbing code to caulk around the base of a toilet?
Yes. Under International Plumbing Code (IPC Section 405.4) and Uniform Plumbing Code (UPC Section 402.2), fixtures having water closet connections must be sealed watertight to the wall or floor. Caulking prevents mop water, bath splash water, and urine from seeping beneath the inaccessible hollow underside of the toilet base, where it would foster foul odors, mold, and bacteria. However, professional plumbers always leave a 1-inch uncaulked gap at the rear of the bowl to serve as an early-warning leak detector.
How much does it cost to repair a broken toilet flange and rotted subfloor in Colorado?
A straightforward closet flange repair (installing a stainless-steel split ring and new wax seal) typically costs between $250 and $450. However, if the leak was neglected and wastewater has caused extensive subfloor dry rot requiring joist sistering, subfloor plywood replacement, and tile re-setting, professional remediation and reconstruction generally ranges from $1,200 to $3,500 depending on the square footage of floor framing affected.
What is Category 3 “blackwater” and why is it dangerous?
Under the IICRC S500 standard for professional water damage restoration, water from beyond the toilet trap seal is classified as Category 3 (Blackwater). Blackwater contains gross unsanitary contamination, including pathogenic coliform bacteria (E. coli, Salmonella), viruses, fungal spores, and chemical waste. Porous building materials saturated by blackwater (such as carpet, padding, and drywall) cannot be salvaged and must be removed and disposed of under containment, followed by hospital-grade antimicrobial disinfection.
Can a leaking wax ring cause sewer gas smell without any visible water on the floor?
Yes, this is extremely common. Because sewer gas is lighter than water, a hairline crack or gap in the wax seal will allow volatile methane and hydrogen sulfide gases to drift upward into the bathroom long before wastewater accumulates enough volume to breach the perimeter tile. If your bathroom has an intermittent sewer odor that seems strongest near the base of the toilet, the wax seal has failed and must be replaced immediately.
Can I double up two wax rings if my toilet flange is recessed below the floor?
Doubling up wax rings is a risky, temporary shortcut that plumbers strongly advise against. A double-stacked wax column lacks structural rigidity; during forceful toilet flushing or plunging, the excess wax easily squeezes into the pipe throat, restricting drainage, or blows sideways out of the joint. The correct, code-compliant solution is installing a rigid PVC flange extender ring sealed to the existing flange with 100% silicone, raising the physical flange rim to its proper 1/4-inch elevation above the tile.
Why do toilet closet bolts corrode and snap off?
Many inexpensive retail toilet kits include zinc-plated steel closet bolts rather than solid brass. Over years of normal cleaning, moisture, bathroom humidity, and trace ammonia from urine condense beneath the plastic bolt caps. This creates a corrosive galvanic environment that eats through the thin zinc plating, rusting the carbon steel until the bolt snaps under normal body weight. Professional plumbers strictly install 100% solid brass closet bolts that never rust.
Protect Your Bathroom Framing with Master Plumber Flange Restoration
Do not let a leaking toilet destroy your bathroom floor joists. Broomfield Emergency Plumber provides precision flange reconstruction, stainless-steel repair rings, subfloor structural repairs, and leak-proof toilet resets throughout Broomfield, Westminster, Arvada, and Boulder County.